Entity settings
Entity settings are where an entity's optional features are switched on and off and its display preferences are set. Several guides send you here, because a page missing from your sidebar is usually a feature that has not been enabled rather than a fault.
Settings are split over separate pages. Select Settings in the sidebar's icon rail; the pages are listed under Entity:
| Page | Address | Holds |
|---|---|---|
| General | /<entityId>/settings | Entity code, default currency, date and number format. In a portfolio entity, also the portfolio mode and tracked tokens cards |
| Team | /<entityId>/settings/team | Members, invitations and roles. See managing your team |
| QuickBooks | /<entityId>/settings/quickbooks | The QuickBooks connection and the features that depend on it. Accounting entities only |
| Reconciliation | /<entityId>/settings/reconciliation | Adjustments and reconciliation notifications. Accounting entities only |
In a portfolio entity the same pages, bar QuickBooks and Reconciliation, sit under the Settings group of the sidebar. In an accounting entity, Entity settings on the dashboard is a shortcut to General.
Admins and owners only
Users and viewers still see the Settings area, but it only holds Token Management for them; the Entity pages are not listed. Users, viewers and guests are redirected to the entity's home page if they open a settings address directly. See roles and permissions.
General
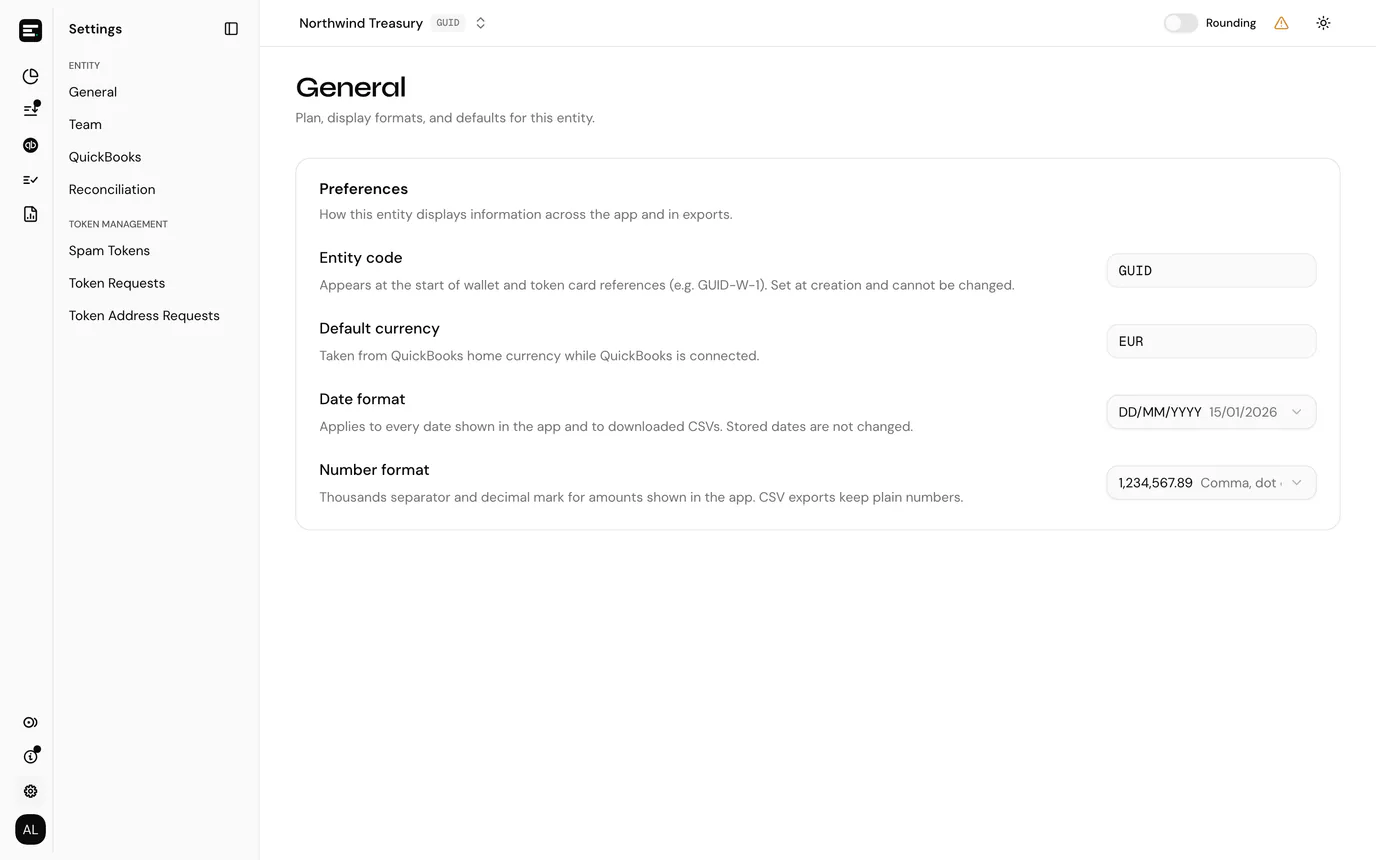
The Preferences card holds settings that change how the entity displays information rather than what it can do. It is on both accounting and portfolio entities. Changes take effect immediately, with a toast to confirm, and there is no confirmation dialog because nothing is being switched on or off.
Entity code
The two-to-six letter code chosen when the entity was created, shown read-only. It is what every reference in the entity is prefixed with, so GUID gives GUID-W-1 for the first account and GUID-TC-1 for the first token card. It cannot be changed, because changing it would rewrite references already quoted in exports and support conversations.
Default currency
The currency the entity reports in: EUR or USD. It drives portfolio values, book balances, and every column headed with a currency.
Changing it shows a toast confirming Default currency set to …. Figures are re-presented in the new currency; nothing already recorded is converted or rewritten.
QuickBooks owns this setting while it is connected
With the QuickBooks integration enabled, the field is read-only and shows the QuickBooks home currency instead. The books have to agree with the ledger they are posted to, so the currency is taken from there rather than set twice. Change it in QuickBooks if it is wrong.
Date format
| Option | Example |
|---|---|
DD/MM/YYYY | 15/01/2026 |
MM/DD/YYYY | 01/15/2026 |
YYYY-MM-DD | 2026-01-15 |
DD-MMM-YYYY | 15-Jan-2026 |
The picker previews each option beside its name, and a change is confirmed with Dates now display as ….
It applies to every date shown in the app and to downloaded CSVs. What it does not do is change anything stored: dates are held in one canonical form and only the display is affected, so exports taken before and after a change describe the same days.
DD/MM/YYYY is the default, and is what an entity uses until somebody picks otherwise.
Number format
The thousands separator and decimal mark used for amounts in the app.
| Option | Example |
|---|---|
| Comma, dot decimal | 1,234,567.89 |
| Dot, comma decimal | 1.234.567,89 |
| Space, comma decimal | 1 234 567,89 |
| No separator | 1234567.89 |
A change is confirmed with Amounts now display as …. Comma, dot decimal is the default.
It is display only. CSV exports keep plain numbers with a dot for the decimal mark, whatever the setting, so spreadsheets read them the same way, and form fields still take a plain number. The Rounding switch in the top bar is separate: it controls how many decimal places token amounts show, not how they are punctuated.
It is per entity, not per user
Everyone working in the entity sees the same date and number format. Someone who works across two entities can see two different formats in one session, which is the intended behaviour: the format belongs to the books.
Portfolio entities
A portfolio entity has no feature switches. Its General page opens with a Portfolio mode / Active card summarising what the mode covers, then the Tracked tokens card, then Preferences:
| Included | Accounting only |
|---|---|
| Wallets, exchanges, and token cards | Posting, categories, and rules |
| Portfolio and balance charts | Reconciliation and adjustments |
| Transaction history | QuickBooks integration |
| Cost basis |
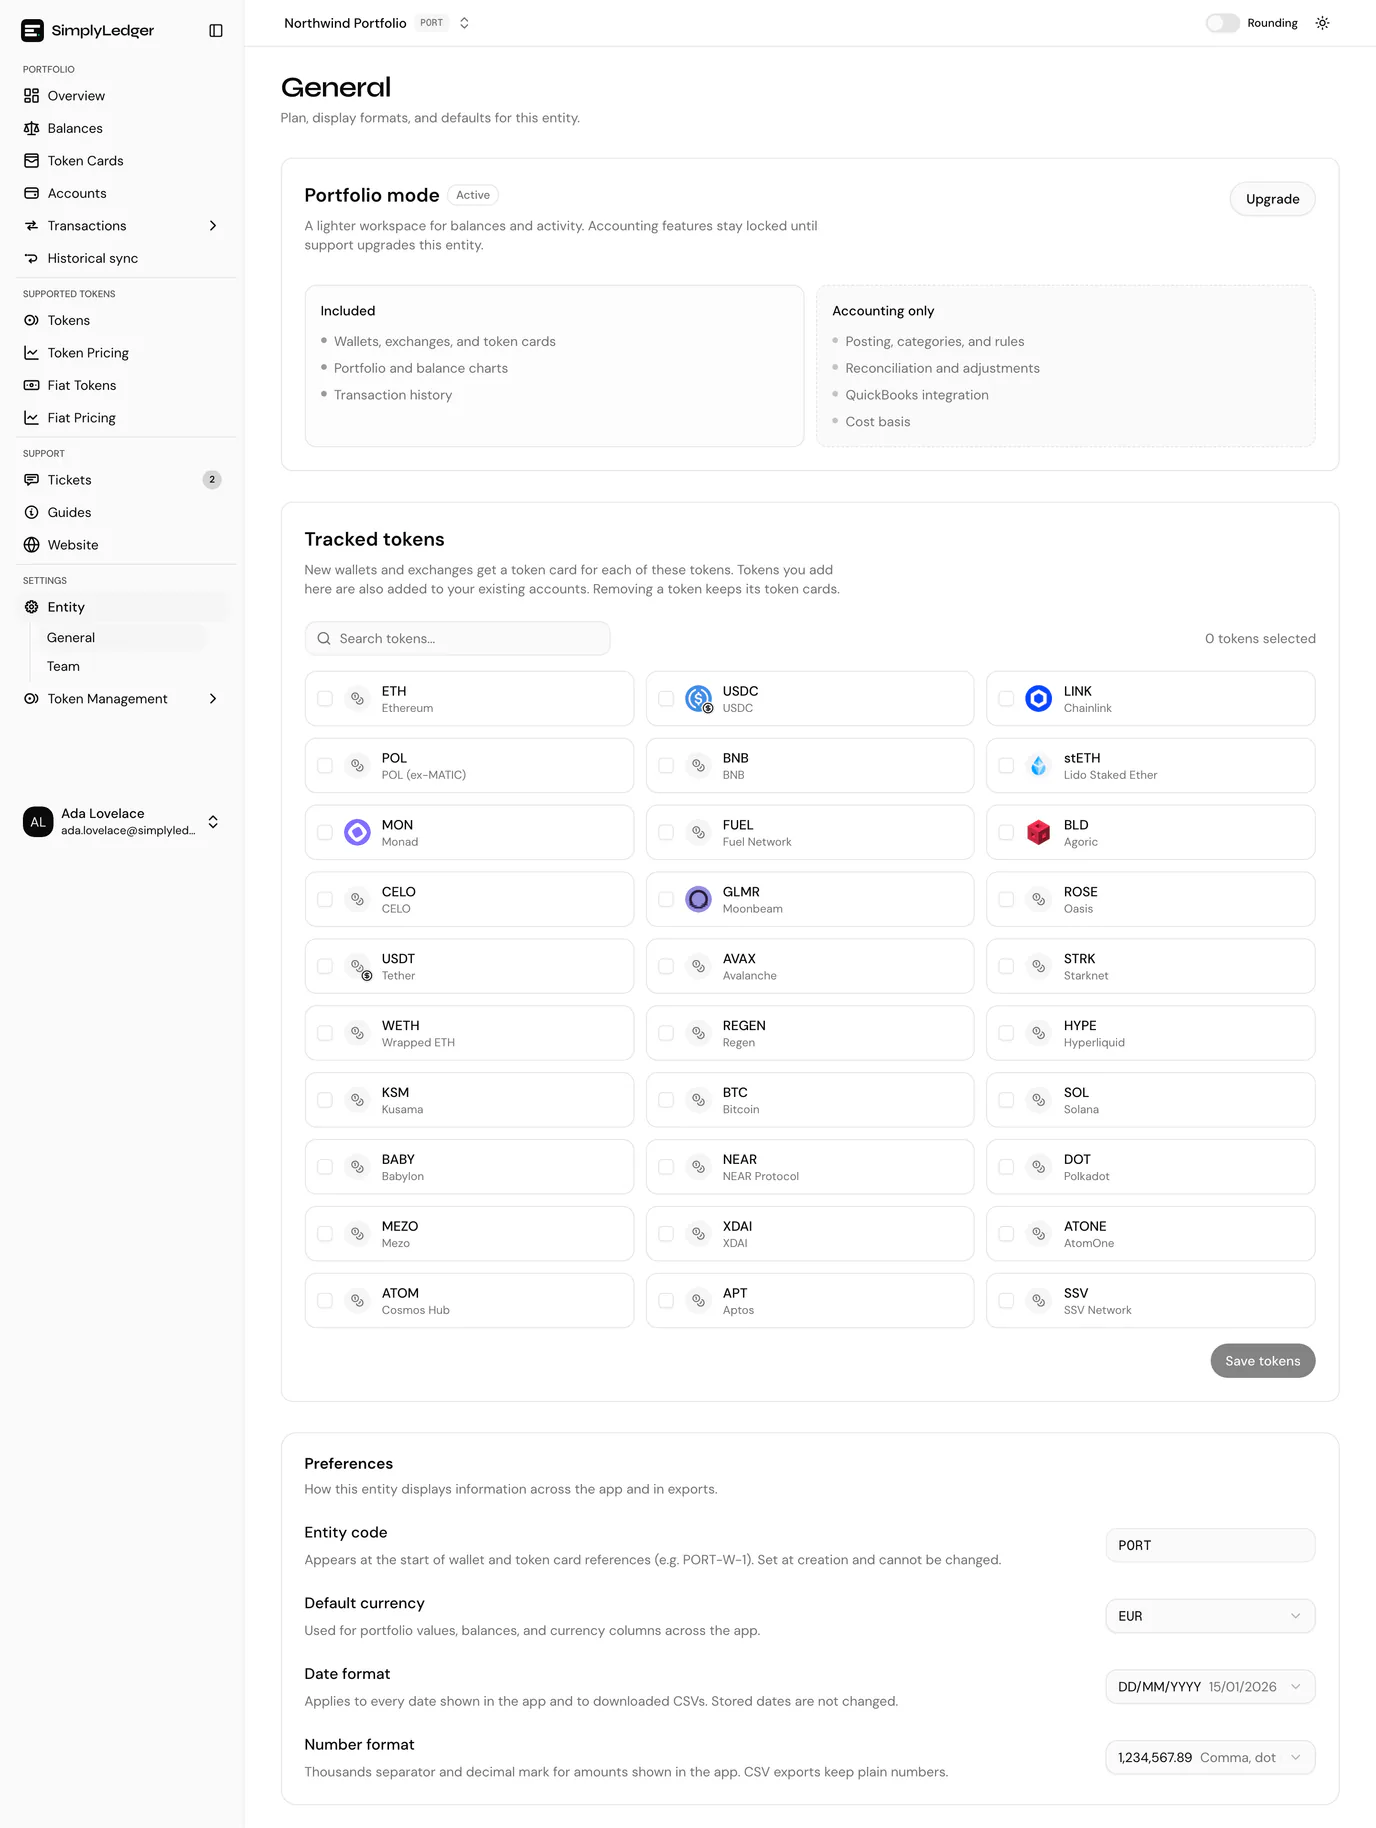
Tracked tokens are the tokens every new on-chain account and exchange gets a token card for, the same list you chose when the entity was created. Tick or untick tokens, most tracked first, and select Save tokens. Tokens you add are also added to your existing accounts. Removing a token keeps the token cards it already has; archive those yourself if you no longer want them. See tracked tokens.
Upgrading to accounting mode
An entity cannot switch itself from portfolio to accounting. Select Upgrade on the Portfolio mode card: it opens a support ticket pre-filled with the entity name and an Upgrade to accounting mode subject. Fill in your reason and send it, and support makes the change.
See portfolio or accounting for what the difference means day to day, and working in a portfolio entity for how the screens differ meanwhile.
QuickBooks
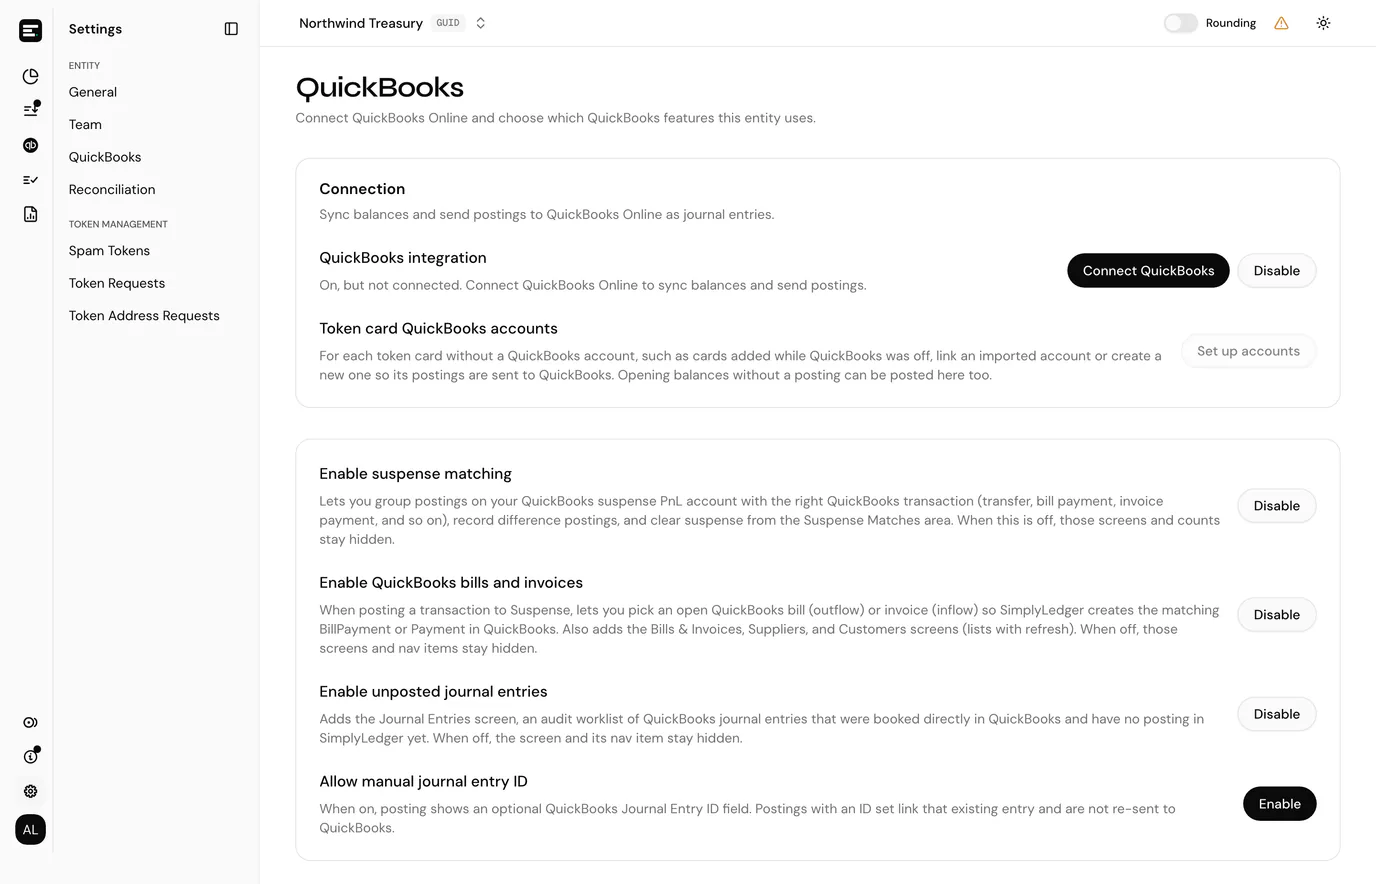
Every switch on this page and on Reconciliation shows a confirmation dialog before it takes effect, telling you exactly what will change. Nothing already recorded is deleted by turning a feature off; the screens are hidden and no new work of that kind can be started.
Connection
QuickBooks integration lets the entity connect to QuickBooks Online, sync balances and send postings as journal entries. Turned off, the entity uses its local chart of accounts only. The line under the switch says where you stand: off, on but not connected, waiting for you to sign in, or connected.
While it is on but not connected, Connect QuickBooks opens the QuickBooks sign-in in a new tab. The page updates by itself once you have signed in; if you closed the tab, Open QuickBooks sign-in again.
Token card QuickBooks accounts appears once the integration is on. Set up accounts, available once connected, opens a page listing every token card without a QuickBooks account: typically cards created while QuickBooks was off. See linking token cards to QuickBooks.
QuickBooks features
With the integration on, a second card holds the features that depend on it:
| Setting | What it does |
|---|---|
| Enable suspense matching | Adds the Suspense Matches area, where postings sitting on the QuickBooks suspense account are grouped, cleared, and their differences posted. |
| Enable QuickBooks bills and invoices | When posting to Suspense, lets you link an open QuickBooks bill or invoice so a BillPayment or Payment is created in QuickBooks. Also adds the Bills, Invoices, Suppliers and Customers screens. |
| Enable unposted journal entries | Adds the Journal Entries screen listing entries booked directly in QuickBooks that have no posting in SimplyLedger, and keeps them refreshed. |
| Allow manual journal entry ID | Adds an optional QuickBooks Journal Entry ID field when posting. A posting with an ID set links that existing entry and is not re-sent to QuickBooks. |
Turning QuickBooks on later
An accounting entity can run without QuickBooks for a while and have it switched on later. Postings made in the meantime are not in QuickBooks yet, so the confirmation dialog says how many there are, and once the integration is on a Finish setting up QuickBooks dialog walks you through three steps:
- Connect QuickBooks, signing in to QuickBooks Online in a new tab.
- Set up token card accounts, giving every token card a QuickBooks account. See below.
- Check your postings. Postings are sent to QuickBooks in batches every 5 minutes, so a large backlog takes a while. Any that cannot be sent stay unsynced in posted transactions.
Each step shows a tick when done. Finish later closes the dialog; everything in it is also reachable from this page.
Linking token cards to QuickBooks
Set up QuickBooks accounts lists each token card without a QuickBooks account, with its wallet and token. For each, pick the imported QuickBooks account it should post to, or leave it on Create new account, which creates one named after the wallet and token. If the account you want is missing, import it from QuickBooks first; the list refreshes when you come back. Once set, a card's account cannot be changed.
When the cards already have postings, you are asked what should happen to them:
- Send them to QuickBooks. They go in batches every 5 minutes once linked.
- Keep them out of QuickBooks, for postings already in your QuickBooks books. They stay in SimplyLedger marked Local only.
Opening balances that were never posted get a similar choice: post them and send them to QuickBooks, post them but keep them out of QuickBooks as Local only, or leave them without a posting. Balances and reconciliations in SimplyLedger are the same either way.
Select Set up n token card(s) to save. With QuickBooks on, admins and owners also see a card on the dashboard counting token cards without a QuickBooks account, with its own Set up accounts link to the same page.
Reconciliation
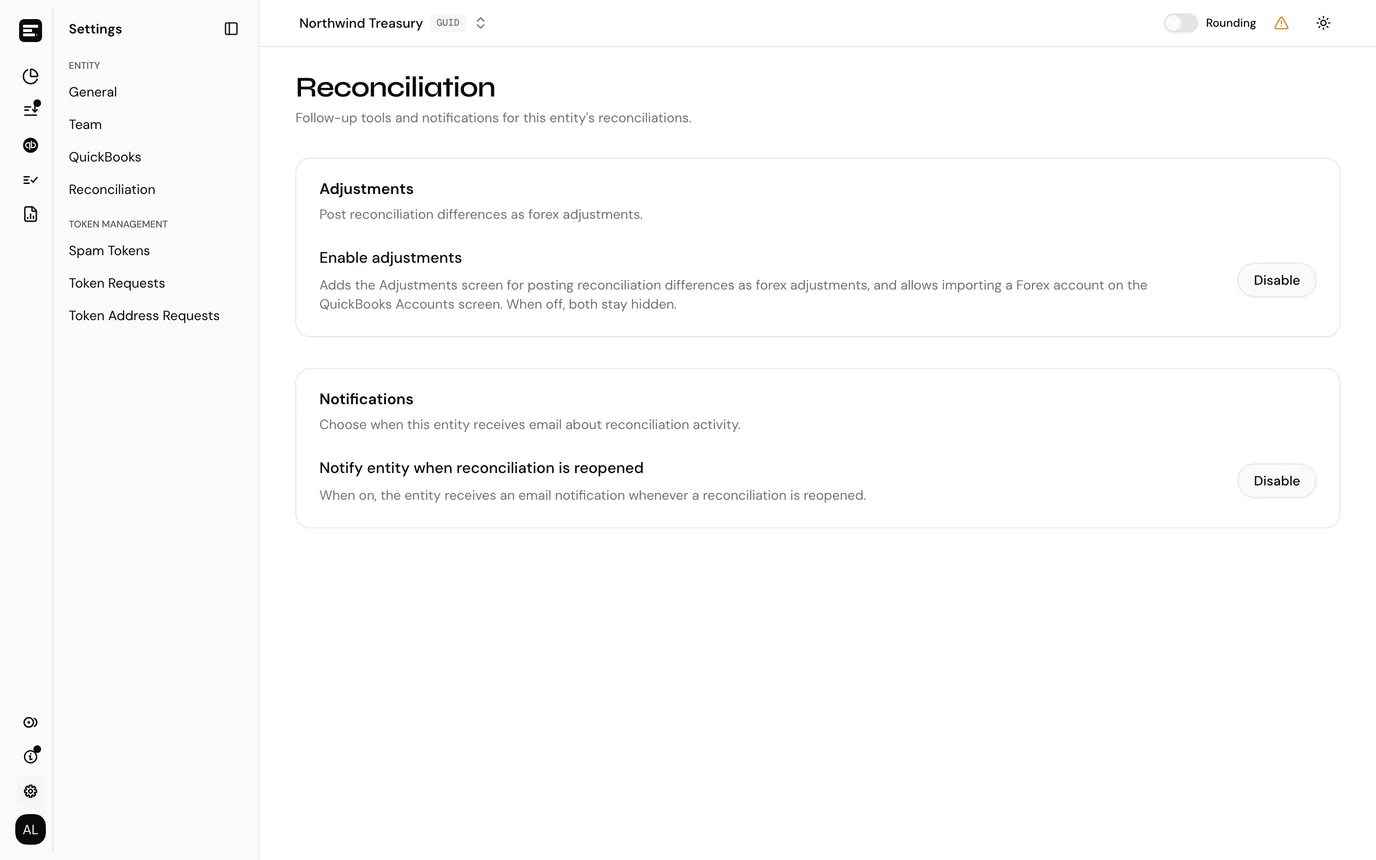
| Setting | What it does |
|---|---|
| Enable adjustments | Adds the Adjustments screen and allows a forex account to be imported on the chart of accounts, so reconciliation differences can be posted as forex adjustments. Adjustments already posted are unaffected by turning it off. |
| Notify entity when reconciliation is reopened | Sends an email whenever a reconciliation is reopened. Useful when more than one person closes periods. |
Common problems
A section is still missing after enabling it. The sidebar rebuilds from the entity record. Reload the page.
The switch fails with an error. The message shown in the toast comes from the server.
The QuickBooks features card is missing. It only appears while QuickBooks integration is on.
Set up accounts is greyed out. The entity is not connected to QuickBooks yet. Select Connect QuickBooks first.
Next
Managing your team covers the Team page.