
Import accounts from CSV
One row per address, and SimplyLedger works out the rest. The import scans every address in the file, finds the chains it is actually used on, and creates an on-chain account per address and chain you tick.
It is the same scan the single create page runs, done in bulk. Use it when you are onboarding a treasury: a list of addresses in a spreadsheet becomes the accounts, on every chain, in one pass.
Only on-chain accounts are imported this way. Exchanges, custodians and fiat accounts are connected individually.
Open the importer
From Accounts, select Import CSV, beside the Create button. The button is only there if you have write access; see roles and permissions.
Prepare the file
Download a CSV template writes a file with the headers the import expects, and two example rows to overwrite.
| Column | Required | Notes |
|---|---|---|
wallet_name | Yes | The name prefix for that address. The chain name is appended per account, so Treasury becomes Treasury Ethereum, Treasury Base, and so on. Up to 100 characters. |
wallet_address | Yes | The address itself. One address per row. |
notes | No | Free text kept on every account created from the row, and shown on the account details page. |
Your own headers are fine: the names above are what the file is remapped to, not what it has to arrive as.
| Limit | Value |
|---|---|
| File size | 10 MB |
| Rows | 500 |
A file over the row limit is refused outright rather than truncated. Split it and import the halves.
The chain is not a column
There is deliberately no chain column. The scan decides which chains an address is used on, and you confirm the list on review. An address that turns up on eight chains produces eight accounts from one row.
Match the columns
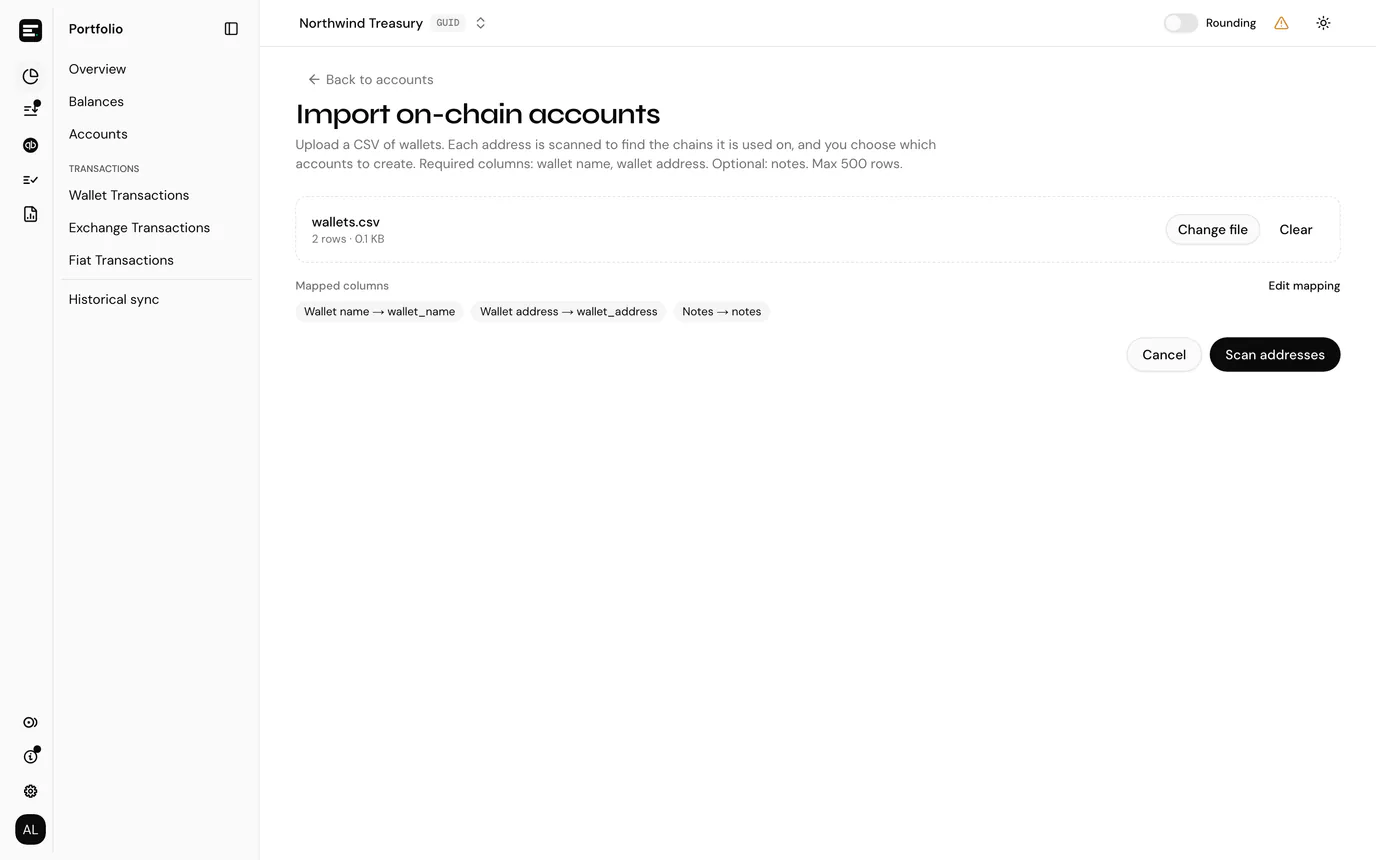
Headers are matched automatically where they are recognisable, and you go straight to scanning. Where they are not, the map step opens, with each field beside a dropdown of your file's headers and a value from the first row so you can see what you are picking.
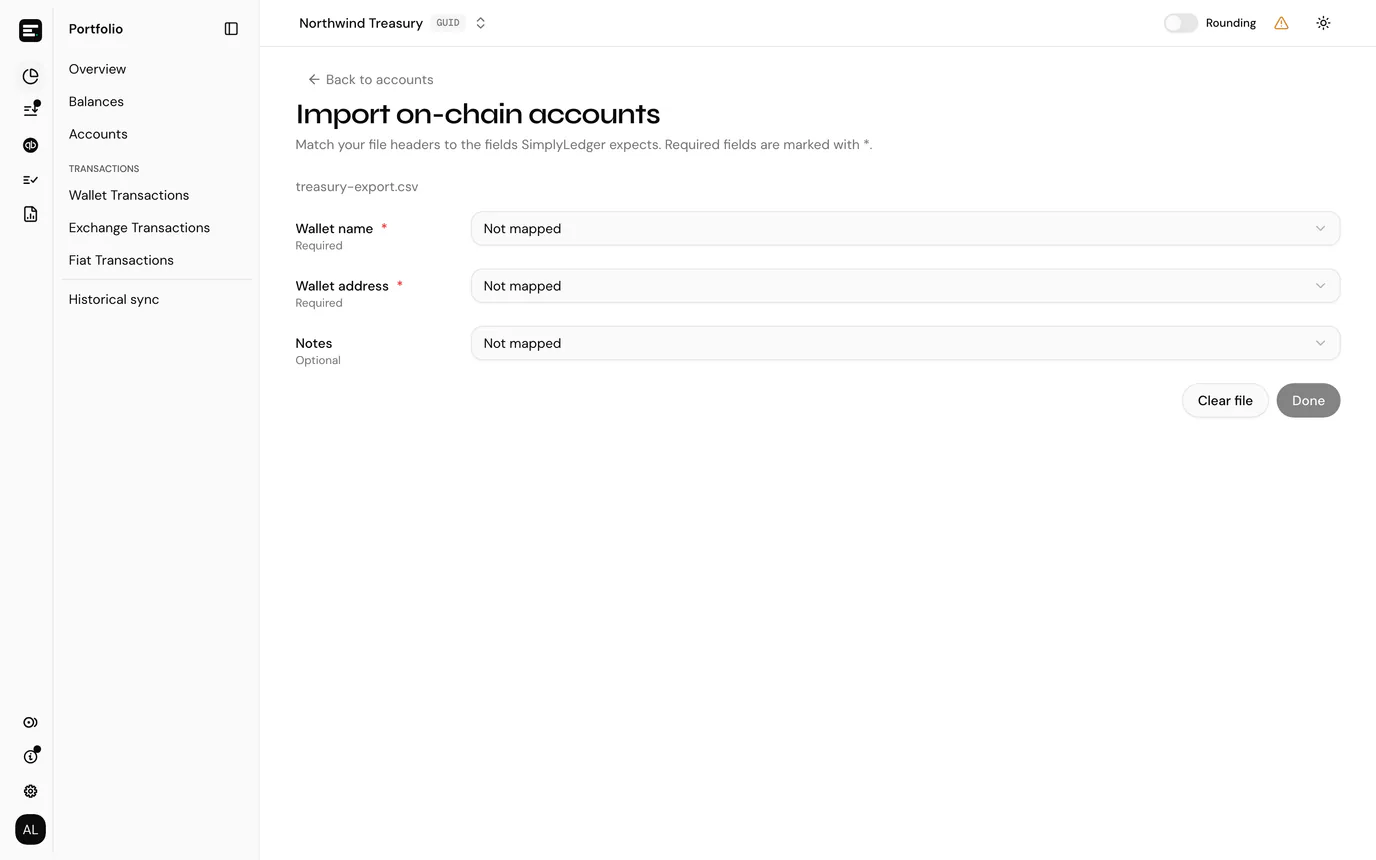
Required fields are marked with * and Done stays disabled until both are matched. On the upload step, the matched columns are listed as Wallet name → Address Label badges, with Edit mapping to come back.
Matching is narrow on purpose: a header called Chain name or Contract address is not claimed as the wallet name or the wallet address, because a confident wrong guess is worse than asking.
Scan the addresses
Scan addresses starts the run and opens the review step. A progress bar reports N of M rows while it works: each address goes through the same checks as the single create page, across EVM chains, Cosmos chains and Bitcoin.
Scanning a few hundred addresses takes a while. The review table fills in as rows complete, so you can start working through the early rows before the last ones land. Create stays disabled until the scan finishes.
Review what will be created
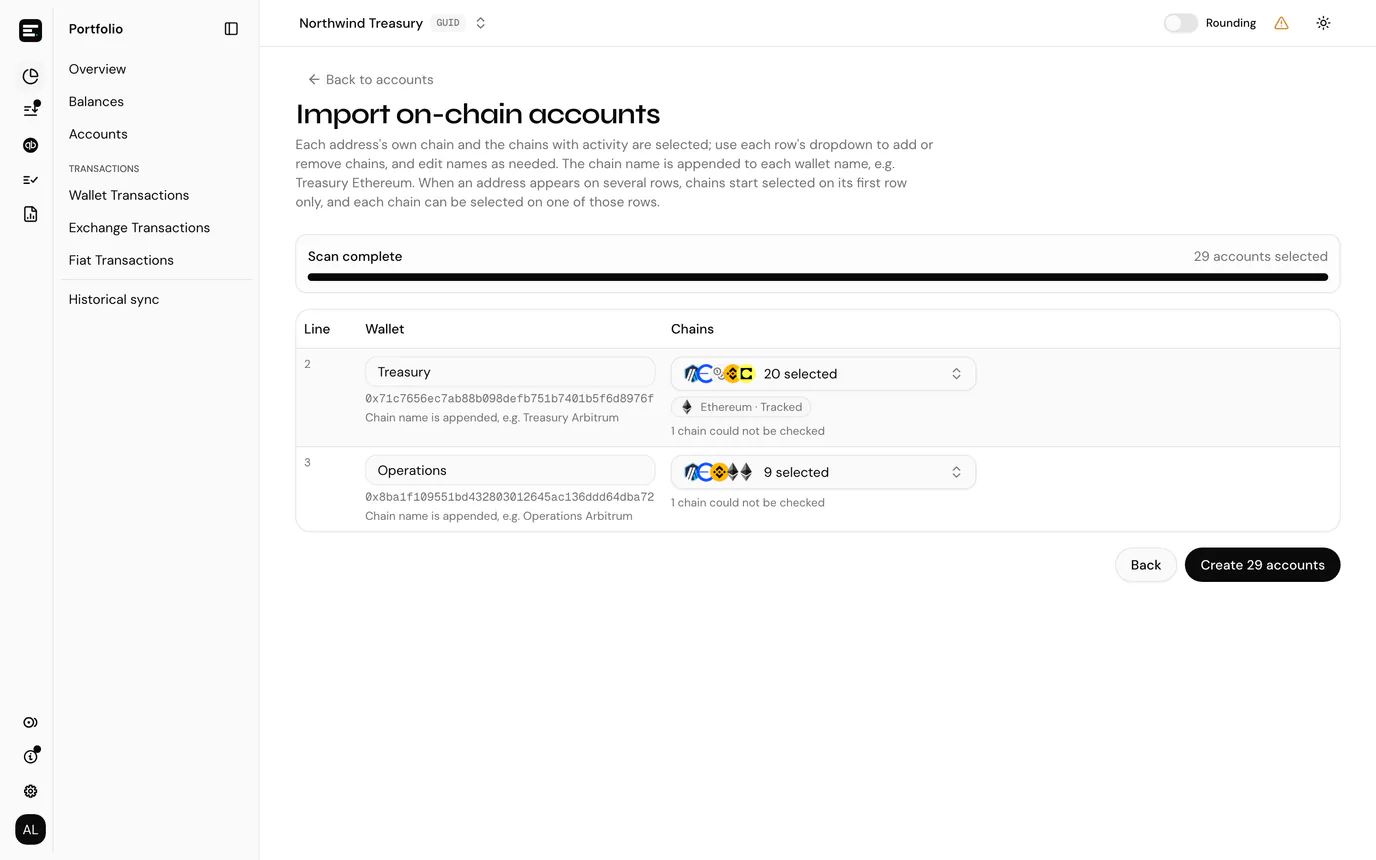
| Column | What it holds |
|---|---|
| Line | The row's line number in your file, so an error can be traced back to it. |
| Wallet | The name, editable here, with the address beneath it and a preview of the name an account will get. |
| Chains | A dropdown of the chains found, ticked where an account will be created. |
The chains that start ticked are the address's own chain and any chain activity was found on. Open the dropdown to add a chain that was quiet or to untick one you do not want; each option says why it is there, Address's own chain or Activity found.
Two things the dropdown will not let you do:
- Chains you already track are not offered. They appear beneath the dropdown as pills reading Ethereum · Tracked, each linking to the existing account, which is usually what you wanted to know.
- A chain already claimed by another row. Where the same address appears on several lines, the row says Same address as line 4 and chains start ticked on the first of them only. The option on the other rows reads Selected on line 4 and is disabled, so one address cannot be created twice on one chain.
A count of chains that could not be checked is shown where any failed. Those are chains the scan could not reach, not chains the address is absent from, so tick one deliberately if you know the address is used there.
Create the accounts
The button carries the count: Create 37 accounts. A row whose name you cleared blocks the import until it is filled in, and the footer says how many are missing.
When everything is created you are returned to the accounts list. In a portfolio entity the confirmation adds that token cards for each account's balances and your tracked tokens are being added, so there is nothing more to set up per account. When some rows fail, the page stays put and shows what happened:
| Created | How many accounts were made, with their references (GUID-W-12, …). |
| Errors | A table of line, name, address, chain and the reason. |
The accounts that succeeded are already created; nothing is rolled back. Fix the listed rows in your file and import just those.
Common problems
"This CSV has 812 rows." Over the 500-row limit. Split the file.
"No rows found in this CSV." The file has a header row and nothing else, or it is not a CSV at all.
A row shows an error instead of chains. The address failed validation, so it was not scanned. The message is on the row; correct the address in your file and scan again.
"This scan is no longer available." Scans do not live forever, and one left open long enough expires. Scan again restarts it from the file you already uploaded.
An address came back with no chains at all. Nothing was found and nothing is tracked. Create it on a single chain from the create page, which lets you pick a chain by hand.
Next
Account details for what to do with the accounts once they exist, or, in an accounting entity, token cards, which each account needs before anything can be posted against it.